How to Export Chart of Accounts from QuickBooks Desktop
Introduction
The Chart of Accounts is the backbone of your accounting system, containing all accounts that help you track your business's financial activity. There may be instances when you need to export this information for backup, analysis, or migration purposes. This guide will walk you through the steps needed to export the Chart of Accounts from QuickBooks Desktop.
Table of Contents
1. Why Export the Chart of Accounts?
Data Backup: To keep a secure copy of your accounting data.
Migration: For moving your financial data to another accounting software.
Financial Analysis: To perform an in-depth analysis using external tools.
Audit Preparation: To provide the necessary data for auditing purposes.
2. Preparation Before Exporting
Backup Data: It's always wise to backup your QuickBooks data before performing any major actions.
Update QuickBooks: Make sure your QuickBooks software is updated to the latest version.
3. Exporting Chart of Accounts: Step-By-Step
Step 1: Access Chart of Accounts
Open QuickBooks Desktop and navigate to Lists > Chart of Accounts.

Step 2: Review Chart of Accounts
Review your accounts to ensure all data is accurate and up-to-date.
Step 3: Start the Export Process
With the Chart of Accounts open, go to File > Utilities > Export > Lists to IIF Files.

Step 4: Select Chart of Accounts
In the Export dialog, check the box next to Chart of Accounts.

Step 5: Export File
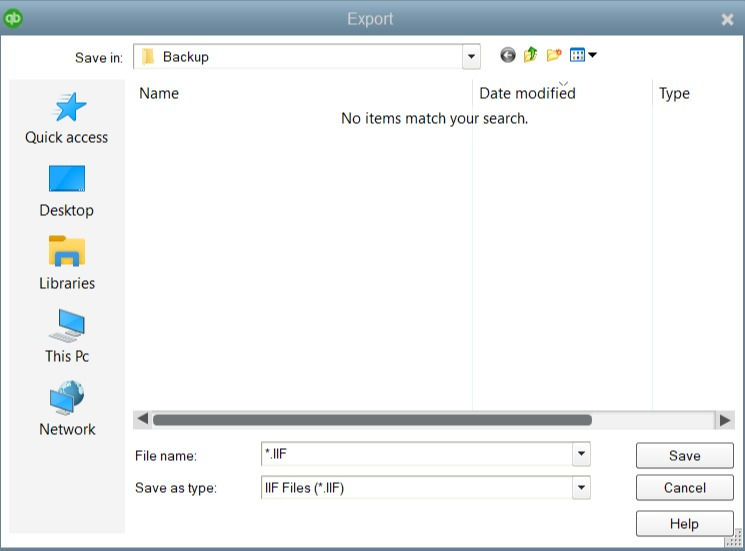
Click the OK button. You will be prompted to choose a location to save the IIF file.
Choose a directory, name the file, and click Save.

Step 6: Confirmation
Once the export is complete, you will receive a confirmation message. Click OK.
4. Importing to Another Software
If you intend to import this data into another accounting software, consult the respective software's manual or support team for guidance on importing IIF files.
5. Troubleshooting & FAQs
Incomplete Data: If your export seems to be missing accounts, double-check to make sure all accounts are active in QuickBooks.
Error Messages: Should you encounter errors during the export, consult QuickBooks support or community forums for solutions.
File Format: The IIF file can be converted to other formats like CSV or Excel for other uses, although this may require third-party tools or manual manipulation.
6. Conclusion
Exporting the Chart of Accounts from QuickBooks Desktop is a simple yet crucial process, especially for data backup, analysis, or migration. Make sure to keep a backup of your QuickBooks data and ensure you are using the latest version of the software for best results.

Comments