Understanding Classes in QuickBooks
- QBA Services LLC

- Oct 8, 2023
- 3 min read
Introduction
When it comes to managing the financial complexities of a business, QuickBooks is a go-to solution for many small and medium-sized enterprises. One of the more advanced features that the platform offers is the ability to track income and expenses by class. While this feature can be incredibly helpful, it can also be a bit confusing for newcomers. This guide aims to help you understand what classes are in QuickBooks, how to use them, and why they can be beneficial for your business.
Table of Contents
1. What Are Classes?
In QuickBooks, classes provide a way to categorize transactions so you can track income and expenses more granularly. You can assign a class to each transaction, allowing you to sort and view financial data by these custom categories. For instance, if you have multiple departments, locations, or projects, you can set up corresponding classes to track the income and expenses for each.
2. Why Use Classes?
Detailed Reporting: Class tracking allows you to create more detailed reports, giving you insights into the profitability of specific segments of your business.
Budget Management: You can allocate resources more efficiently by reviewing class-specific financial data.
Project Accounting: Track the costs and revenues associated with individual projects.
3. How to Set Up Classes in QuickBooks
QuickBooks Desktop
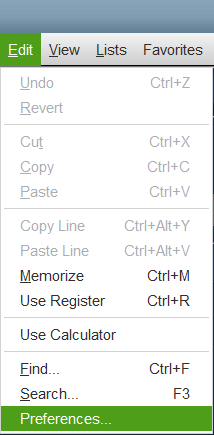
Enable Class Tracking: Go to Edit > Preferences > Accounting > Company Preferences and check the "Use class tracking" box.
Create a New Class: Navigate to Lists > Class List > New.
Enter Details: Fill in the class name, and if needed, associate it with a parent class. Click OK.


QuickBooks Online
Go to Settings: Click the Gear icon on the top right.
Account and Settings: Navigate to Advanced > Categories.
Turn on Class Tracking: Enable the "Track classes" option.
Add Classes: Go back to the settings Gear icon, click on All Lists > Classes > New.
4. Best Practices for Using Classes
Be Consistent: Always use the same naming conventions and apply classes to transactions consistently.
Don't Overcomplicate: Start with a few broad classes and add more as you get comfortable with tracking.
Review and Update: Periodically review the classes to ensure they are still relevant.
5. Common Pitfalls
Forgetting to Assign Classes: Transactions without a class will show up in an "Unspecified" category, making your reports less accurate.
Over-Classification: Creating too many classes can make your accounting unnecessarily complex.
6. Conclusion
Understanding how to use classes in QuickBooks can give you valuable insights into different segments of your business. From tracking income and expenses for specific projects to allocating resources more effectively, classes can be a powerful tool for business owners. As with any accounting practice, the key is to be consistent and to review and adjust as necessary.


Comentários